Thursday, August 30, 2012

Not So Sweet but Boozy Good-bye

When I got pulled aside on that Friday afternoon, I had a feeling it wasn't going to be good news.  This little piece of sunshine had decided to move on to a new opportunity. 

If you know Ms. Clara, you'd know we had to send her off with love and booze. This woman's drink of choice is an extra dirty martini, which I don't believe translate well into a cupcake.  Looking for an alternative, i was told by a co-worker about Irish Car Bomb cupcakes.  The recipe I used is from Alli-N-Sons

Below are some photos, of the cupcakes 

And the final touch was adding her angelic face to each cupcake

Congratulations! You will/are missed in the office!


Saturday, August 18, 2012

Bourbon what?!?!

So I was helping my friend Celeste come up with ideas for a party she was throwing for her husband Nate.  After looking through Pinterest, she decided to theme it around Bourbon.  So as I helped her think of some fun ideas to execute and I came across the following picture and recipe that I personally wanted to try.

Decoration Idea for Nate
Cake Recipe for Matt
Source: Uploaded by user via Di on Pinterest

Maker's Mark Cake 
Since we already had a cake for the party (Bourbon Carrot Cake), this was just going to be a mini cake for decoration to be displayed by the Bourbon bar.  Any cake will do, the cake displayed was a 6 inch round cake with two layers.  Frosting was a buttercream dyed to a golden cognac color.  

Now for the finishing touch which really makes the cake . . the red wax.  So initially after looking at the  cake I found on Pinterest, I was actually going to use red fondant.  However, being crazy and over thinking it . . I decided that the fondant would not create the drippy edge look that the Maker's Mark bottle has.  So I thought back and remembered making a white chocolate ganache that dripped all over when I tried to make a beach-scape cake for Nicole.  Knowing that if the ganache was cold enough it would harden and hold the shape like the red wax.  Note this ganache must be made a day ahead to allow it to cool and thicken otherwise it will be too watery (and can be made 3 days before assembling the cake).

Red White Chocolate Ganache
  • 1 cup heavy (whipping) cream
  • 2 tbsp cacao nibs chopped
  • 1 pinch of salt
  • 6 ounces of white chocolate
  • Red food coloring (I used a lot to obtain the deep red color)
  1. In a small sauce pan over medium heat, combine cream, cacao nibs and salt and bring to a simmer, remove from heat and steep for 30 minutes
  2. Strain the cream through a fine mesh sieve and discard nibs then reheat until bubbles form around the edges
  3. Place chocolate in a seperate heat proof bowl
  4. Pour cream over chocolate and let sit, then stir until chocolate is melted and mixture is smooth
  5. Add food coloring until desired color is reached
When assembling the cake, be careful not to put too much at one time . . and know that it will continue to drip a little further than where you push it.  

Bourbon Pecan Carrot Cake - by Bob Vivant
This recipe is AMAZING . . . I've made this on 3 occasions and everyone has loved this cake.  I have also been told that I had a heavy hand when it cake to dipping/soaking the cake in Bourbon.

The first person that I made this for was for my client Matt.  He is one of the nicest clients I have ever worked for and he is very appreciative of the work we do (not to suck up if you are reading this Matt)

I once recall him saying he looked forward to the day when there would be someone on the team that could sit down with him and have a good whiskey.  So when I saw this recipe, I thought this would be a perfect cake for him for his birthday due to the Bourbon twist.  In addition, my mom used to decorate cakes and I found an old 80's cake topper that I knew Matt would know.  For those of you who can't recognize him, that's ALF . . and as I recently learned - Alien Life Form

Matt's Birthday ALF cake


Cupcake Version:
Additionally I made a cupcake version of this.  The recipe as is will give you about 12-15 cupcakes.  I assembled the cupcakes in two different ways, for experimentation, but also because I didn't get a chance to start this process until around 11pm, so I was looking for something quick so I could go to sleep.
  1. Cupcake Pan Assembly - easiest and fastest
  2. Paper Strip Assembly - longer but prettier
You may not even need to provide support when assembling these if you even put a ring of the cream cheese frosting to work as a dam for the liquid cheesecake.

Cut Cupcake in half


Dip bottom half in bourbon (your choice on how strong you want the cupcake to be), and place into cupcake tin.  Next, add a layer of cream cheese frosting, then layer of pecan mixture, and finally the  liquid cheese cake.  Take the top of the cupcake and dip it into the bourbon and place on top.  In the photo below you will see each layer added going clockwise.  Once done, cover and place in the freezer.


If you are tight on freezer space, this might be the better option.  I think this also makes the cupcake come out much prettier and stronger structurally.  The cupcake pan has space as you stack towards the top.  Similar to the above.

Cut the Cupcake in half and tip bottom layer into bourbon and place onto your plate.  Take a strip of parchment paper and wrap it around the base of the cake.  If you have plastic strips even better, but I don't mean plastic wrap as you need something firm but flexible to give support.  These paper strips will work like a spring form pan.

Add in your layers of yumminess.  Then add the top half of the carrot cake, don't forget to dip it into the bourbon.  Then move to the freezer.


Once complete your cupcake version bourbon pecan carrot cake should look like this.  See how beautiful the layering looks!

Before serving pull out of the freezer to thaw.  Once plated, remove the paper strip and . . . . Ta dAh!


Saturday, August 4, 2012

Anne's Bridal Shower

My really good friend Anne is getting married this September and these cupcakes were for her bridal shower.  I knew ahead of time that I wanted to make her some really cute cupcakes.  Her colors are themed around orchids (green and purple), and her and her fiancé love Disney.  So what better theme to do for her bridal shower than Minnie Mouse and Orchids.


I talked to Anne, and asked her what her favorite cupcakes were and she told me Green Tea.  I thought to myself . . Green Tea?  Gross . . . and I didn't have a recipe for that.  So I knew . . I had to do a test run before the actual day, because I did not want to bake nasty cupcakes and have all Anne's friends think that.  Additionally, I'm not a big green tea fan, so I wasn't sure what to look for in terms of flavor.

So as usual, I consulted Pinterest for ideas and came across the The Sweetest Kitchen, Sugar, Spice and Everything Really Nice.  This is where I found the recipe I used for this cupcake, which is really a Magnolia Vanilla Cupcake recipe with Matcha added in.  I added the Matcha into the dry ingredients.


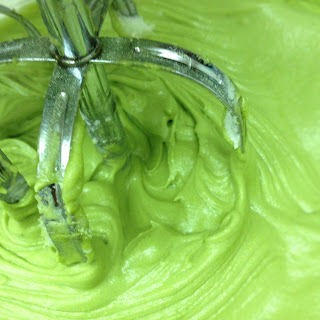
This is the brilliant color that came out when mixing the wet and dry ingredients.

I didn't use the cream cheese frosting from the blog, because it lead to a deactivated page.  So I used the one from the Bourbon Pecan Carrot Cake Recipe and did not add Matcha as I wanted to allow some flavor contrast.  However that recipe only provided enough cream cheese frosting to cover 12 cupcakes and I had baked 2 dozen.  Additionally, I had no more cream cheese and did not want to run to the store again.  I decided to make a buttercream . .  but again when I looked in my fridge I only had 1 stick of unsalted butter, but I had like 5 sticks of sweet cream which has salt.  Did I really want to go to the store? Nooooo!!!!! Soooo . . I said whatever, how different could the buttercream taste?  Plus I've been on a salted anything kick anyways.  

The buttercream turned out better than I expected.  I loved the contrast of the salty and sweet.  Here's the recipe, which makes about 5 cups, this will be a little more than enough to heavily frost 12 cupcakes.

Buttercream
  • 5 large egg whites
  • 1 cup sugar + 2 tbsp sugar
  • 1 pinch of salt
  • 1/2 cup unsalted butter
  • 1 1/2 cup salted butter
  • 1 1/2 tsp vanilla extract
  • 2 tbsp. Matcha 
  1. Combine egg whites, sugar and salt in a heatproof blow over a pan of simmering water.  Whisk until mixture is warm and sugar has dissolved.  Remove from heat.
  2. With you mixer, whisk on low gradually increasing speed.  Continue whisking until stiff peaks form, mixture should be fluffy and glossy (about 10 minutes)
  3. With the mixer on a low speed, begin to add the butter.  Add butter a few tablespoons at a time mixing well after each addition.
  4. Once all butter has been added, add the vanilla.
  5. Change your whisk attachment to paddles, beating on low speed for about 2 minutes to remove the air bubbles.
  6. Add in Matcha 

Just so you know this is why I called this blog "Madness" Behind the Cake, because sometimes things happen that are unexpected, mixing bowls break, you run out of ingredients, you have deadlines and you stayed out or went to a concert the night before and couldn't start baking until 11:30 at night or you just didn't manage your time well, or you just had a brain fart and forget to add an ingredient like sugar when making creme brûlée (disgusting).

Well on this night  . . while making my buttercream . . . my glass mixing bowl cracked.  I guess my mixing bowl was not tempered glass like I assumed.  I had only made this same buttercream recipe like 20 times before and in this same fashion.  

While heating the egg whites and sugar over a pot of simmering water I heard a pop, which was the crack in my mixing bowl.  So I had to find a bowl close to it's size, and hold it to my mixer to ensure it didn't fly off.  It was not fun trying to cream that butter.  In the end, the buttercream did turn out, but it just took me twice as long . . . .   

So in the end, I frosted 1 dozen with the cream cheese frosting, sprinkling matcha powder on the tops.  Then the other dozen I frosted with the green tea buttercream frosting placing the minnie mouse heads into each one.  Minnie mouse heads were made out of rolled out black fondant using a cookie cutter.  The same was done with the flowers.  Additionally I used a luster dust on the white flowers to add dimension.   Congratulations Anne!  Can't wait to see you walk down the aisle!