Saturday, December 1, 2012

My Mother's First and Favorite

My mother loves mahjong and gambling.  Growing up every weekend we would drive to my aunt's house in Oakland so my mom could play.  It was pretty fun as us kids would always get to stay up late and the adults would not pay any attention to us.  I got away with sooo many things because of this (washing my cousins hair with soda, pouring boxes of mix cereal on the floor and stomping on it)

Anyways, my mother's birthday was coming up and it was close to a big one.  So I thought, why not surprise her?  Since her big birthday was next year she probably wouldn't suspect anything.  My brother and I decided to have her surprise dinner at PPQ Dungeness Island.  My mother also LOVES crab and I had been trying to take her here for months.


The Cake:
I was inspired by the following cake, but knew I didn't want to use orchids or make the cake this tall.  So I took this idea and appropriated it a little by changing the character and flowers.


                                          Source: kakestudio.blogspot.com via Cari on Pinterest


I'm an ABC and know very little Chinese, so I reached out to my amazing cousin to ask her what should be written on her cake.  My cousin sent me pictures, examples of how to write the characters and the order of each brush stroke.  Here's a series of diagrams that she sent me.  Thanks so much Karen!

This is the traditional character for "Long Life" (after Karen realized I was going to put mahjong blocks on the cake, she said she should have told me to use "Wealth" instead)


I went online and started looking up what flowers would best be used based on chinese beliefs/symbolism.  I wanted a balance between a pretty flower and something symbolic.  I really like what the Citron represented (luck and happiness), but have you seen what they look like?. . not so pretty.  So I went with peonies as they are a symbol of nobility and value.

1. Peonies


2. Character Topper


3. Mahjong Blocks
(To poke fun at my mom . . she has a GREAT sense of humor)


4. Gold Trim
(I ran out of time and only did the top layer)


Surprisingly, this was actually my mom's first birthday cake (so she said).  When she told me this on the way home, I was in disbelieve and then I thought about it more.  My mom had never wanted a cake before saying she didn't eat cake and always told us to just save our money.  I felt a little bad, knowing that she had to wait so long for something so simple.  At least her first cake was a pretty one!

But I later recalled, that I did get her a cake circa 1998 or 1999.  I reminded her that I went to the local Lucky and bought her a snickers cake because that was her favorite candy bar at the time.  She then remembered and started laughing.  (That's right . . I'm not an ungrateful child!)


My mother actually used to decorate cakes herself, so some of the techniques I learned were from her.  She told me that she actually made her father's first birthday cake too.  And jokingly said when her father said thank you, she thought "I'm still waiting for my first birthday cake from you!"

Happy Birthday Mom!  Thank you for being an amazing mother and giving me an amazing childhood and a life with limitless possibilites.  I'm truly grateful.

Thursday, October 18, 2012

Cupcakes for Diner en Blanc

Diner en Blanc was started by a handful of friends in Paris 24 years ago.  It is a diner by invite, where guests dress in white and meet for a mass "chic picnic" in a public space.  The one catch is that this public space isn't announced until the last minute.  Due to this, this has enabled the Diner en Blanc to take place in some of the most prestigious sites within the French capital.  For more information please check out the official site of Diner en Blanc

Cupcake Dozen #1 - Floral Cupcakes


Cupcake Dozen #2 - Brush Embroidery / Textured Cupcakes

The second dozen of cupcakes were inspired by a video I found that utilized this brush embroidery on cookies.  SweetAmbsCookies videos on YouTube are so amazingly beautiful and inspirational.  Check them out if you have time.


I've never made cookies with royal icing . . but this is definitely something I want to try after watching these videos.

Wednesday, October 3, 2012

The Royal Treatment

This was our dear old Grandpa's birthday (He's the youngest looking Grandpa you'll ever meet).  Lindsay decided to come up with a theme and thought of giving him the Royal Treatment for his birthday.  As you can see even the royal couple decided to show up.  His birthday also came with his own Drag Bag complete with a wig, earrings, sash and double sided tape

The theme for the cupcakes was to have something pretty with something "unexpected." So cupcakes made were the honey cupcakes but filled with a jalapeño pepper jelly.  To further make it unexpected, not all cupcakes were filled, just ones with the crowns.


Saturday, September 22, 2012

Esteban & Jenny's Wedding

I've known Esteban for nearly 10 years.  We used to work together at a movie theatre working the late shifts (5pm-2am!) due to midnight showings.  When I first met him, I thought he looked like a real life Super Mario.  So when his birthday came around, I drew him a birthday card of super mario wearing our movie theatre uniform.  Working together for a little over a year, my DDR partner in crime and I stayed in touch throughout the years.  Esteban is one of kindest and most giving so I'm so glad that he found Jenny as she is such a sweet heart and compliments his so well. 


Making a wedding cake is a big project.  This cake, along with the 3 other sheet cakes that was fed to a wedding of 300 people was baked by Jayson Delos Santos.  He also didn't just make one flavor cake, but made 3 per the request of the couple.  

My only part in this was to help Jayson execute the decorating of this cake based on a photo.  From a decorating standpoint this was a 3 layer cake consisting of an 8 inch, 10 inch and 12 inch rounds. Jayson rolled the fondant and covered each layer.  I piped the design around the cakes starting with the base border then the sides.  

The cake topper was arranged by Jayson.  Yellow and white roses were inserted into a half sphere of flower foam. The cake tiers were tacked onto plastic spacers supported by dowels that locked in place.  This was beneficial for allowing us to arrange the flowers ahead of time.  The remaining flowers were used to decorate the table.


Not only does Jayson bake cakes, but he also took Esteban and Jenny's engagement photos! Congrats Esteban and Jenny


Thursday, August 30, 2012

Not So Sweet but Boozy Good-bye

When I got pulled aside on that Friday afternoon, I had a feeling it wasn't going to be good news.  This little piece of sunshine had decided to move on to a new opportunity. 

If you know Ms. Clara, you'd know we had to send her off with love and booze. This woman's drink of choice is an extra dirty martini, which I don't believe translate well into a cupcake.  Looking for an alternative, i was told by a co-worker about Irish Car Bomb cupcakes.  The recipe I used is from Alli-N-Sons

Below are some photos, of the cupcakes 

And the final touch was adding her angelic face to each cupcake

Congratulations! You will/are missed in the office!


Saturday, August 18, 2012

Bourbon what?!?!

So I was helping my friend Celeste come up with ideas for a party she was throwing for her husband Nate.  After looking through Pinterest, she decided to theme it around Bourbon.  So as I helped her think of some fun ideas to execute and I came across the following picture and recipe that I personally wanted to try.

Decoration Idea for Nate
Cake Recipe for Matt
Source: Uploaded by user via Di on Pinterest

Maker's Mark Cake 
Since we already had a cake for the party (Bourbon Carrot Cake), this was just going to be a mini cake for decoration to be displayed by the Bourbon bar.  Any cake will do, the cake displayed was a 6 inch round cake with two layers.  Frosting was a buttercream dyed to a golden cognac color.  

Now for the finishing touch which really makes the cake . . the red wax.  So initially after looking at the  cake I found on Pinterest, I was actually going to use red fondant.  However, being crazy and over thinking it . . I decided that the fondant would not create the drippy edge look that the Maker's Mark bottle has.  So I thought back and remembered making a white chocolate ganache that dripped all over when I tried to make a beach-scape cake for Nicole.  Knowing that if the ganache was cold enough it would harden and hold the shape like the red wax.  Note this ganache must be made a day ahead to allow it to cool and thicken otherwise it will be too watery (and can be made 3 days before assembling the cake).

Red White Chocolate Ganache
  • 1 cup heavy (whipping) cream
  • 2 tbsp cacao nibs chopped
  • 1 pinch of salt
  • 6 ounces of white chocolate
  • Red food coloring (I used a lot to obtain the deep red color)
  1. In a small sauce pan over medium heat, combine cream, cacao nibs and salt and bring to a simmer, remove from heat and steep for 30 minutes
  2. Strain the cream through a fine mesh sieve and discard nibs then reheat until bubbles form around the edges
  3. Place chocolate in a seperate heat proof bowl
  4. Pour cream over chocolate and let sit, then stir until chocolate is melted and mixture is smooth
  5. Add food coloring until desired color is reached
When assembling the cake, be careful not to put too much at one time . . and know that it will continue to drip a little further than where you push it.  

Bourbon Pecan Carrot Cake - by Bob Vivant
This recipe is AMAZING . . . I've made this on 3 occasions and everyone has loved this cake.  I have also been told that I had a heavy hand when it cake to dipping/soaking the cake in Bourbon.

The first person that I made this for was for my client Matt.  He is one of the nicest clients I have ever worked for and he is very appreciative of the work we do (not to suck up if you are reading this Matt)

I once recall him saying he looked forward to the day when there would be someone on the team that could sit down with him and have a good whiskey.  So when I saw this recipe, I thought this would be a perfect cake for him for his birthday due to the Bourbon twist.  In addition, my mom used to decorate cakes and I found an old 80's cake topper that I knew Matt would know.  For those of you who can't recognize him, that's ALF . . and as I recently learned - Alien Life Form

Matt's Birthday ALF cake


Cupcake Version:
Additionally I made a cupcake version of this.  The recipe as is will give you about 12-15 cupcakes.  I assembled the cupcakes in two different ways, for experimentation, but also because I didn't get a chance to start this process until around 11pm, so I was looking for something quick so I could go to sleep.
  1. Cupcake Pan Assembly - easiest and fastest
  2. Paper Strip Assembly - longer but prettier
You may not even need to provide support when assembling these if you even put a ring of the cream cheese frosting to work as a dam for the liquid cheesecake.

Cut Cupcake in half


Dip bottom half in bourbon (your choice on how strong you want the cupcake to be), and place into cupcake tin.  Next, add a layer of cream cheese frosting, then layer of pecan mixture, and finally the  liquid cheese cake.  Take the top of the cupcake and dip it into the bourbon and place on top.  In the photo below you will see each layer added going clockwise.  Once done, cover and place in the freezer.


If you are tight on freezer space, this might be the better option.  I think this also makes the cupcake come out much prettier and stronger structurally.  The cupcake pan has space as you stack towards the top.  Similar to the above.

Cut the Cupcake in half and tip bottom layer into bourbon and place onto your plate.  Take a strip of parchment paper and wrap it around the base of the cake.  If you have plastic strips even better, but I don't mean plastic wrap as you need something firm but flexible to give support.  These paper strips will work like a spring form pan.

Add in your layers of yumminess.  Then add the top half of the carrot cake, don't forget to dip it into the bourbon.  Then move to the freezer.


Once complete your cupcake version bourbon pecan carrot cake should look like this.  See how beautiful the layering looks!

Before serving pull out of the freezer to thaw.  Once plated, remove the paper strip and . . . . Ta dAh!


Saturday, August 4, 2012

Anne's Bridal Shower

My really good friend Anne is getting married this September and these cupcakes were for her bridal shower.  I knew ahead of time that I wanted to make her some really cute cupcakes.  Her colors are themed around orchids (green and purple), and her and her fiancé love Disney.  So what better theme to do for her bridal shower than Minnie Mouse and Orchids.


I talked to Anne, and asked her what her favorite cupcakes were and she told me Green Tea.  I thought to myself . . Green Tea?  Gross . . . and I didn't have a recipe for that.  So I knew . . I had to do a test run before the actual day, because I did not want to bake nasty cupcakes and have all Anne's friends think that.  Additionally, I'm not a big green tea fan, so I wasn't sure what to look for in terms of flavor.

So as usual, I consulted Pinterest for ideas and came across the The Sweetest Kitchen, Sugar, Spice and Everything Really Nice.  This is where I found the recipe I used for this cupcake, which is really a Magnolia Vanilla Cupcake recipe with Matcha added in.  I added the Matcha into the dry ingredients.


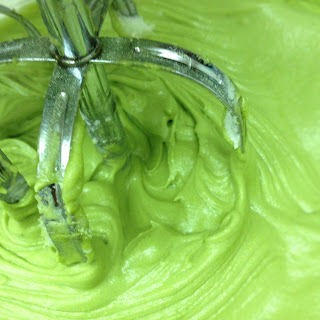
This is the brilliant color that came out when mixing the wet and dry ingredients.

I didn't use the cream cheese frosting from the blog, because it lead to a deactivated page.  So I used the one from the Bourbon Pecan Carrot Cake Recipe and did not add Matcha as I wanted to allow some flavor contrast.  However that recipe only provided enough cream cheese frosting to cover 12 cupcakes and I had baked 2 dozen.  Additionally, I had no more cream cheese and did not want to run to the store again.  I decided to make a buttercream . .  but again when I looked in my fridge I only had 1 stick of unsalted butter, but I had like 5 sticks of sweet cream which has salt.  Did I really want to go to the store? Nooooo!!!!! Soooo . . I said whatever, how different could the buttercream taste?  Plus I've been on a salted anything kick anyways.  

The buttercream turned out better than I expected.  I loved the contrast of the salty and sweet.  Here's the recipe, which makes about 5 cups, this will be a little more than enough to heavily frost 12 cupcakes.

Buttercream
  • 5 large egg whites
  • 1 cup sugar + 2 tbsp sugar
  • 1 pinch of salt
  • 1/2 cup unsalted butter
  • 1 1/2 cup salted butter
  • 1 1/2 tsp vanilla extract
  • 2 tbsp. Matcha 
  1. Combine egg whites, sugar and salt in a heatproof blow over a pan of simmering water.  Whisk until mixture is warm and sugar has dissolved.  Remove from heat.
  2. With you mixer, whisk on low gradually increasing speed.  Continue whisking until stiff peaks form, mixture should be fluffy and glossy (about 10 minutes)
  3. With the mixer on a low speed, begin to add the butter.  Add butter a few tablespoons at a time mixing well after each addition.
  4. Once all butter has been added, add the vanilla.
  5. Change your whisk attachment to paddles, beating on low speed for about 2 minutes to remove the air bubbles.
  6. Add in Matcha 

Just so you know this is why I called this blog "Madness" Behind the Cake, because sometimes things happen that are unexpected, mixing bowls break, you run out of ingredients, you have deadlines and you stayed out or went to a concert the night before and couldn't start baking until 11:30 at night or you just didn't manage your time well, or you just had a brain fart and forget to add an ingredient like sugar when making creme brûlée (disgusting).

Well on this night  . . while making my buttercream . . . my glass mixing bowl cracked.  I guess my mixing bowl was not tempered glass like I assumed.  I had only made this same buttercream recipe like 20 times before and in this same fashion.  

While heating the egg whites and sugar over a pot of simmering water I heard a pop, which was the crack in my mixing bowl.  So I had to find a bowl close to it's size, and hold it to my mixer to ensure it didn't fly off.  It was not fun trying to cream that butter.  In the end, the buttercream did turn out, but it just took me twice as long . . . .   

So in the end, I frosted 1 dozen with the cream cheese frosting, sprinkling matcha powder on the tops.  Then the other dozen I frosted with the green tea buttercream frosting placing the minnie mouse heads into each one.  Minnie mouse heads were made out of rolled out black fondant using a cookie cutter.  The same was done with the flowers.  Additionally I used a luster dust on the white flowers to add dimension.   Congratulations Anne!  Can't wait to see you walk down the aisle!


Monday, July 9, 2012

Bacon . . . need I say more?

Before I start . . . let me tell you that on this #Baconday, I have never had a food coma like this EVER.  We celebrated two things here . . Jocelyn's belated birthday (because on her real birthday, she was in Tulum, Mexico eating white truffle fettucini) and Tiffany's Farewell lunch.  And if you know these ladies . . you know they can eat.  You can check out their blogs here:
On to the reasoning for the #baconday theme.
  • Jocelyn absolutely LOVES bacon.  She not only will eat it, but will incorporate it into whatever she can.  I can't even tell you how many different bacon dishes she knows or has made all at once for one meal.  Ask her about that one Thanksgiving.  
  • We work in Advertising and Media specifically so we have to stay up to date with what's trending and relevant.  
  • Jocelyn HATES/FEARS birds
So I thought it would be cute/funny to decorate her desk with Social Media, Twitter Birds and Bacon.  Twitter birds were printed and cut out, along with bacon strips that were signed and placed on the ceiling . . . there were a couple of vegetables added in per Mary (remember the closet vegetarian?).  Additionally we used old magazines to make word clouds, and then called out her favorite things/topics #whitetrufflefettucini #friedchicken #macncheese #secret breakfast

Bacon Carmel
I went online and found a recipe from Savour-Fare.com for a bacon salted caramel brownie. I didn't follow this recipe exactly, but I followed steps 1-2 to make the bacon caramel (obviously i doubled the bacon amount).  I want to add that my kitchen smelled amazing . . because it smelled like bacon (I also am I huge fan of bacon)

Brownie
For the brownie, I used the Martha Stewart for her Fudgy Chocolate Brownies, but before baking, some of the bacon caramel was poured and mixed into the brownie.  

Bacon Roses
This came to mind as Jocelyn had recently showed me an image of Bacon Roses.  Essentially, I rolled the bacon and baked them.  I even tried cutting the edges to make the appearance of petals . . but it didn't really make a difference.  If you're really into making the perfect bacon roses, check out how Instructables did it.


EXTRA:
Not only on Bacon day did I have my Bacon Carmel Brownies drizzled with warm burnt bacon carmel with Bacon Rose Buds, but I went to eat lunch at PPQ Dungenuss Island where among 5 petite women we had, 2 large crabs, 2 different orders of chicken, 2 bowls of garlic noodles and an order of imperial rolls (Joce . . . let me know if i missed something). Not only that . . . but we stopped by PurpleKow where you get milk tea, in gigantic bowls not cups.  Here are some pictures of our lunch!


Wednesday, June 13, 2012

Mary, Mary Quite Contrary How Does Your Garden Grow?

Mary is known at my office as the "vegetarian."  Nothing against vegetarians, I have a ton of friends that are, but it's more that Mary is in denial.

Why we believe Mary is in denial:
  1. We'll go to a fancy restaurant and she will go through the menu and say . . . "oooo I think i'm going to get the TOFU steak."
  2. Mary naturally ALWAYS gravitates to vegetables
  3. Mary has NEVER been seen eating a steak
  4. Her first time eating SuiMai she picked at the wrapper eating everything but the Pork
Okay . . onto the cake, but in this case it was a brownie.  The idea for her birthday brownie was a collaboration between myself and Jocelyn who is a super foodie/yelp elite (who is against Mary's food choices).  We decided to make Mary a garden cake due to her love of vegetables and . . . wait for it . . . we were going to add BACON.  We decided we could partly use this as a test. If Mary is truly a carnivore she would have to eat the bacon too.  Additionally, we had the idea of making garden fences with the bacon to symbolize or act as a metaphor for her closet vegetarianism. 

The Brownie:
You will see that I love Martha Stewart. I found this recipe in 2007 in Food Everyday and have used it ever since.  The recipe is know as Martha Stewart's Super Fudgy Brownies.  I think these brownies are AMAZING, but I have one friend who thinks otherwise.  In my opinion, these brownies come out so rich and moist.  The best part about brownies are you can add pretty much anything into them . .  as you will find out in a future post.  
BTW Mary did end up eating the Bacon, but we still question her.
The Garden:
I went online to look for some example gardens and to figure out what vegetables would be easiest to make out of fondant or gum paste.  I decided to make:
  • Lettuce 
  • Cauliflower
  • Carrots
  • Tomatoes
  • Pumpkins
Making Lettuce and Cauliflower is very similar to making roses.  The Lettuce is exactly the same except I texturized the pedals/leaves.  With the Cauliflower I did the very same except I used a tiny white ball as the base then added leaves around it.  If you don't want to hand texturize you can use the Wilton Flower Impression Mat for the lettuce leaves and the Cauliflower head.

For the carrots I took orange fondant and rolled them into the cones and then used a knife to imprint lines.  Before the carrots dried, I pressed a hole into the top of the carrots so I could adhere the carrot leaves once they dried. Fondant gets really tacky when wet. For the leaves, small strips were cut then bunched together.  Note for the carrots that were buried in the ground, the bottoms were cut off to give the appearance of being pushed into the cake.

Tomatoes were just red fondant rolled into little balls.  I attempted to be fancy and mix in colors to make heirloom tomatoes . . but . . . in the end I didn't use them.  I also made some potatoes,  rolling brown fondant into balls and just texturizing them by poking tiny holes into them.

The pumpkins were made out of orange fondant that were rolled into a ball. Lines were then imprinted to shape the pumpkin.  On the brownie, the pumpkins were complimented by piped buttercream vines and leaves.    

The fences were also made out of fondant.  Note you need to make these ahead of time to allow them to dry and harden (if you're short on time, you should make these out of gum paste as it hardens much faster).  Fondant was rolled out and cut into strips then textured by hand.  The best way to do this is by making random lines and applying different pressure when imprinting lines.

The dirt is crushed chocolate cookie wafers.  If you can't find those specifically you can always use Oreos minus the cream.

Lastly we have the Scarecrow, which was the focal point . . . or was it? Some would argue it is the bacon.  The scarecrow has a wire base.  Fondant was layered over the wire.  The face was purposely left off as I printed Mary's face and taped it on.  If I could do this again, I might have added some luster dust to define the straw a bit more.  However in the end i was really happy with it.  It even has some curves!

I think that covers it all.  Just to recap  . . Carmel Buttercream, Bacon and Chocolate go soooo well together.